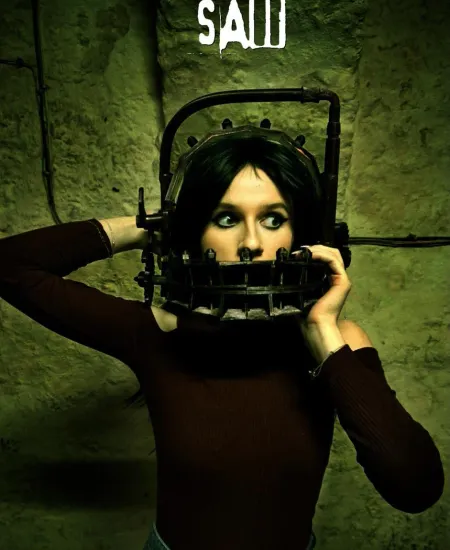
Hey guys! I am so excited to share with you the process of building my Amanda Saw Reverse Bear Trap cosplay from Dead by Daylight. It was a long and challenging project, but I am so proud of the final result.
The first step was to 3D print all the necessary parts and categorize them accordingly. Once we had everything, we started putting the pieces together. The jaws of the trap and the headband were the first to be installed. In order to unify the parts, we had to put nails through all the parts to hold them together. The parts were printed with PLC, which is pure plastic, so glueing them together was not an option.


Next, we moved on to the details. This was a work of precision, as our printer was quite small, and we had to split some parts into smaller pieces to print them at the needed size. In the photos, you can see how the backside was assembled and how the cogwheels were attached. The pipe over the headband was the last piece attached, as it had to be positioned across the headband, with one side in the front and one side in the back.


After all the pieces were assembled, it was time for the final touches. I added some paint and details to bring the cosplay to life. And now, I am proud to present to you the final result! The Reverse Bear Trap cosplay is complete, and it looks amazing.


This was an incredibly detailed project, and I am so happy to have had the opportunity to work on it and present it to you. Stay tuned for more Dead by Daylight cosplays and behind the scenes looks at the process.
Thanks for following along on this journey, and I hope you enjoy the final result as much as I do!


“Most people are so ungrateful to live. But not you.”#saw #Amanda #thepig #intothefog #DeadbyDaylight #cosplayer pic.twitter.com/kBEJfqWqdJ
— Bearerine (@BearerineTV) November 30, 2020
I made a Reverse Bear Trap for an Amanda cosplay but thought you guys might enjoy seeing it!
by u/BearerineTV in deadbydaylight
Subscribe to our email newsletter and unlock access to members-only content and exclusive updates.

Comments